Working with environments
After you have successfully deployed your first application, let’s explore the concept of Environment in practice. In this section you will learn how to create and manage your environments.
- Pre-requirements for FREE accounts
- Creating an environment
- Selecting an environment
- Removing an environment
- FAQ
- What’s next
Pre-requirements for FREE accounts
This step is only required if you have a FREE account, users of other plans can directly jump to Creating an environment.
The FREE account by default has a single environment named default that uses all the available quota of the account. As such, you will not be able to create any other environment since your plan does not have any extra unassigned quota. You can however split the quota into two or more environments as needed. To do that, first follow the steps in Removing an environment to remove the default environment, and then continue with Creating an environment to create new environments with a portion of the available quota.
Creating an environment
To create an environment, navigate to the environments window by clicking on the user icon in the top right corner of the main window, and clicking on “environments”. After that, you will be presented with a list of the current environments.
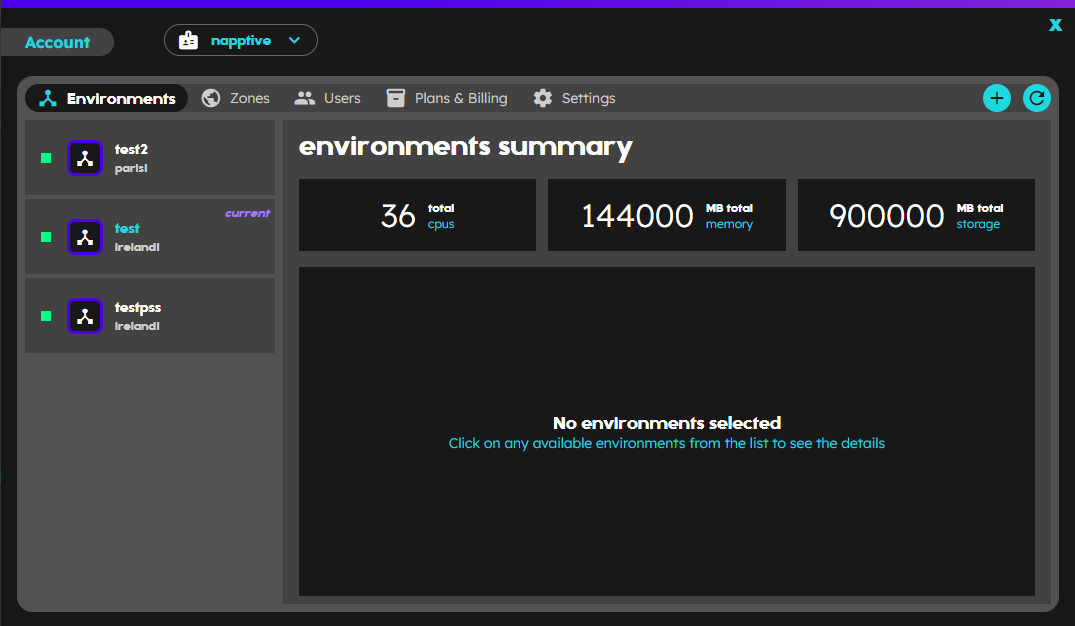 Figure: Current environments
Next, click on the plus button situated in the top right corner of the same window, and the dialog with the options to create the environments will be shown. Start by entering the “Environment Name”, which uniquely identifies your environment. Next, you may provide an optional “description” to add any extra information or notes about the environment. Following this, select the appropriate “Zone” for your environment from the available options (if more than one); this indicates the geographical location of the servers hosting your environment. For resource allocation, use the sliders or the input text next to each resource name to define the limits for CPU, Memory, and Storage for your environment. These sliders make it easy to adjust the desired quota, balancing your needs on the resources.
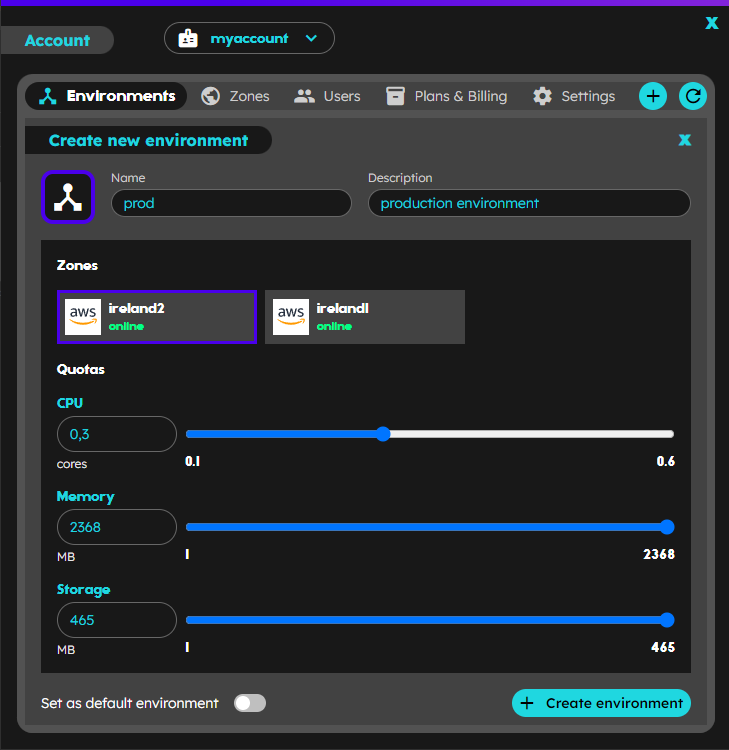 Figure: Create environment dialog
Once you’ve filled out the form, click on “Create Environment” to finalize your setup. As an optional step, you could check the box “Set as Default Environment” before submitting. Doing so will make this environment the default one, which means it will be automatically selected when you log into your account.
Selecting an environment
To change between environments, use the top bar on the left-hand side, and select the environment.
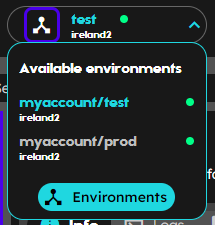
Figure: Selecting an environment
Removing an environment
To remove an environment navigate to the environments window by clicking on the account icon on the top right corner of the main window, and clicking on “environments”. After that, you will be presented with a list of the current environments. Select the environment you would like to remove and click on the delete button
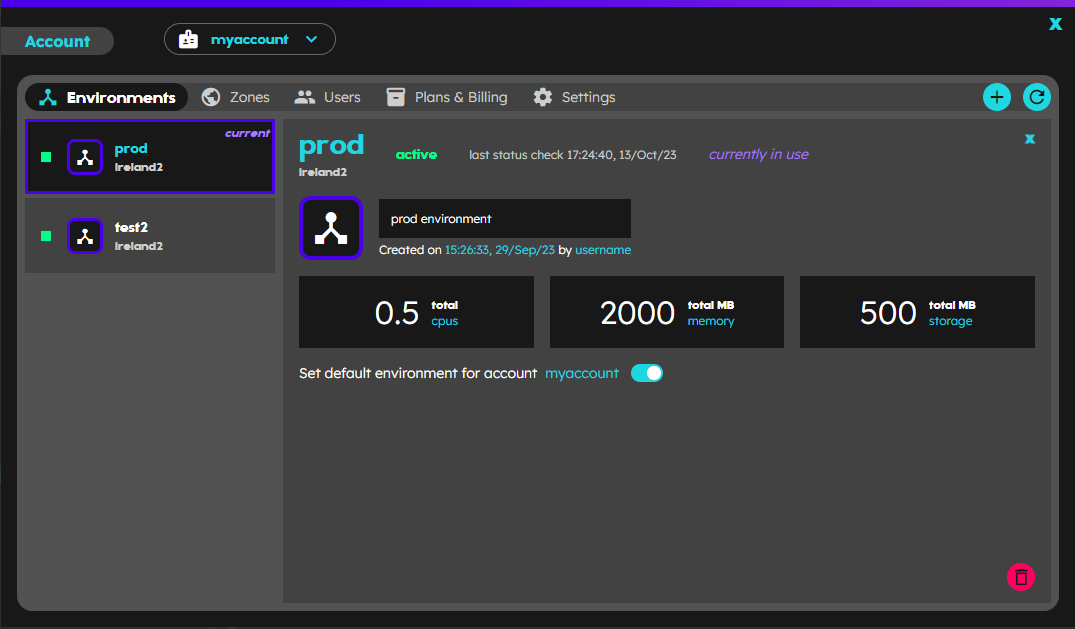 Figure: Deleting an environment
FAQ
Change default account login environment
To remove an environment navigate to the environments window by clicking on the account icon on the top right corner of the main window, and clicking on “environments”. After that, you will be presented with a list of the current environments. Select the environment you would like to set as default and click on the toggle switcher.
Figure: Selecting a new account login default environment
This action may be also performed through the ‘Account settings’ in the settings section. In the following section, account preferences there is a more detailed description of how to perform changes in the settings.
How many environments can I create?
The number of environments is limited depending on your subscription plan. Free accounts are limited to 3 environments, increasing to 5 for pro accounts. If you need more environments contact support to see how we can help you.
Can I resize an existing environment?
Unfortunately at this point it is not possible to resize an existing environment. To do that, you would need to delete the existing environment and recreate it with the updated quota.
What’s next
- Something did not work out/behave as expected? Contact support or contact us via the Community Slack so we can help you.
- Go back and deploy an application on any of the new environments.
- Learn how to work with the CLI.
- Deploy a custom application